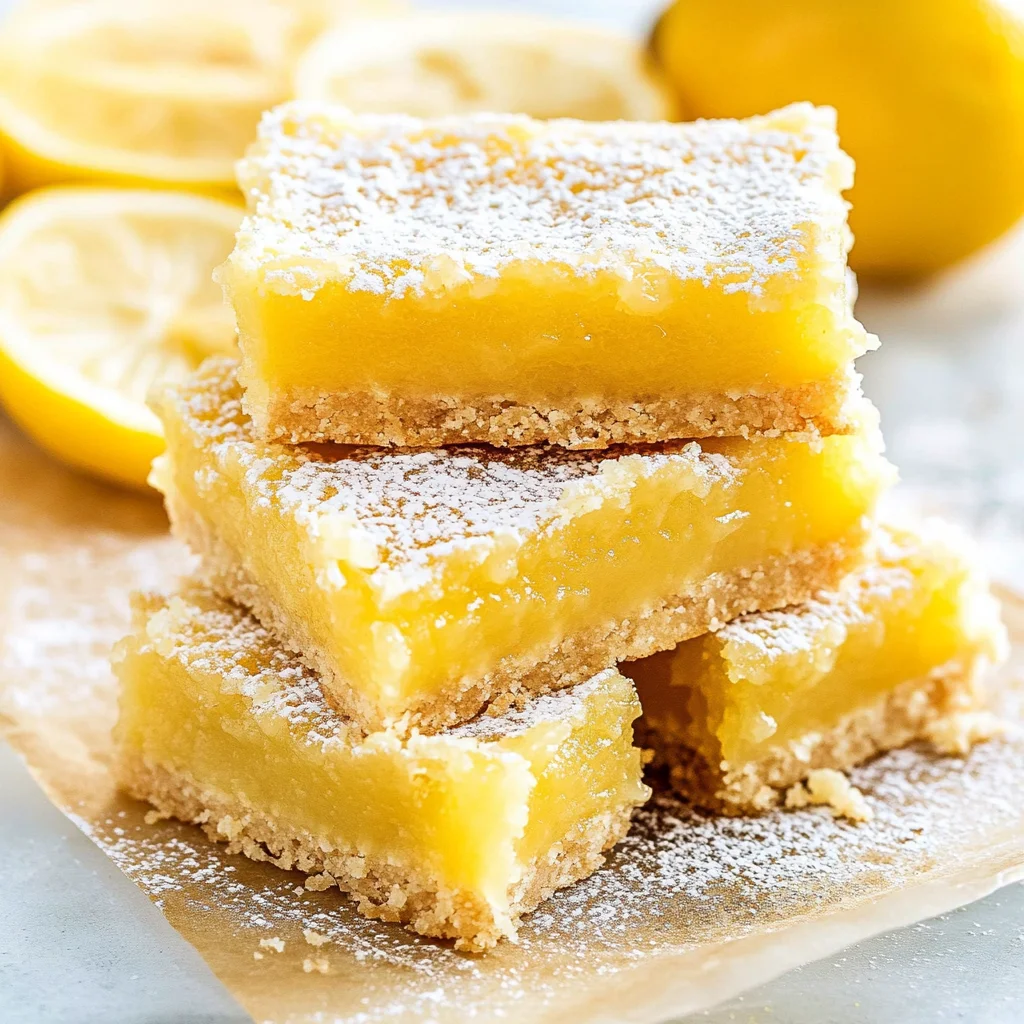
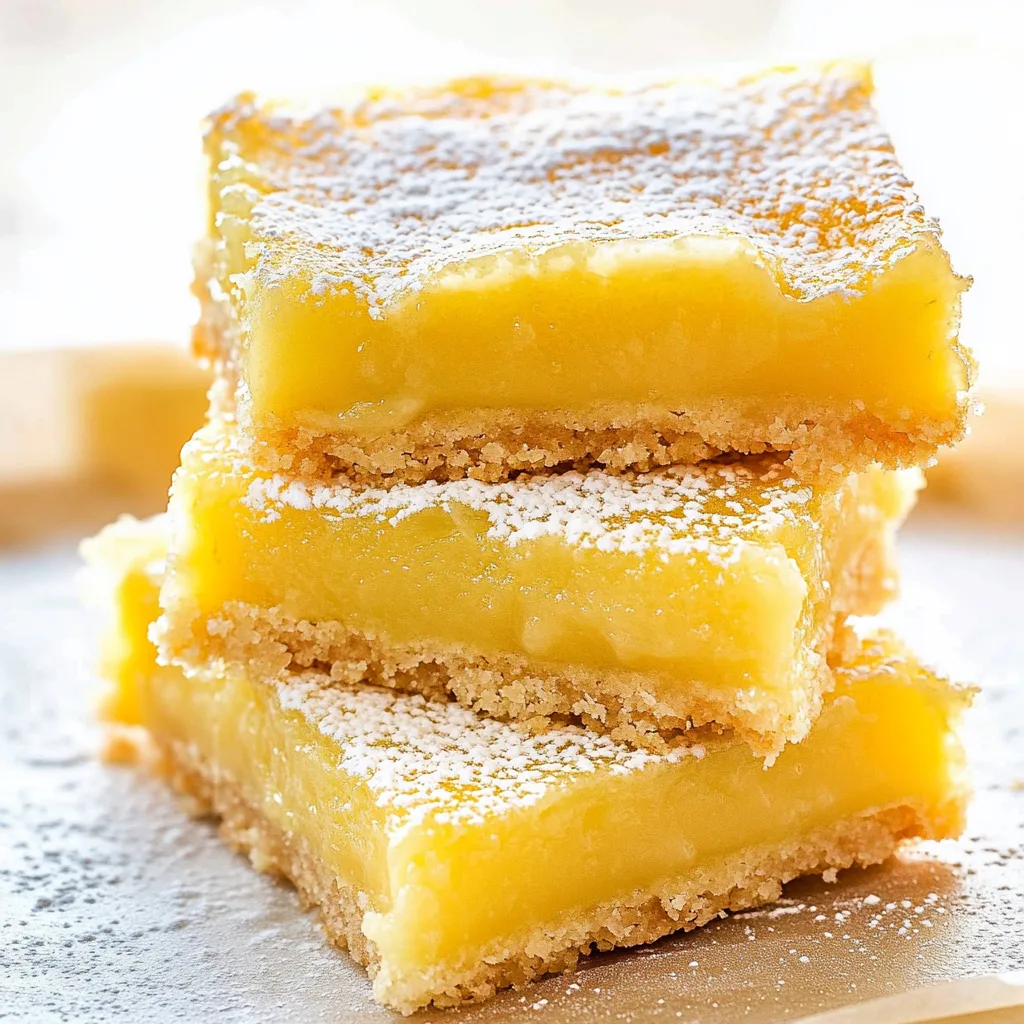
Imagine biting into a perfectly tangy lemon bar, where the zesty citrus flavor dances on your tongue, and the buttery crust crumbles delightfully with each mouthful. The aroma of fresh lemons wafts through the air, instantly transporting you to sun-soaked summer picnics or cozy family gatherings, where laughter and sweet treats abound.
As I reminisce about those sun-drenched afternoons spent in my grandmother’s kitchen, I can’t help but smile at how her lemon bars became the star of every dessert table. They were more than just a treat; they were a symbol of joy and togetherness, perfect for birthdays or lazy weekends. Trust me when I say these lemon bars will not only brighten your day but also leave you craving just one more bite!
Why are Lemon Bars so irresistible?
Bright, zesty flavors make every bite a refreshing delight!
- Easy to make: This recipe requires minimal ingredients and effort, perfect for busy bakers.
- Versatile treat: Ideal for picnics, parties, or a simple afternoon snack.
- Crowd-pleaser: Everyone loves the sweet-tart combo that leaves taste buds tingling.
- Quick preparation: Whip these up in no time for last-minute events!
Indulge in these delightful Lemon Bars and watch them disappear in a flash!
Lemon Bars Ingredients
For the Crust:
- 1 1/2 cups all-purpose flour – Provides the base; make sure to spoon and level for accuracy.
- 1/2 cup powdered sugar – Sweetens without grittiness; can substitute with coconut sugar for a deeper flavor.
- 1/2 cup unsalted butter (1 stick, softened) – Adds richness; use margarine if you need a dairy-free option.
- 1/4 teaspoon salt – Enhances flavors; adjust to taste if using salted butter.
For the Lemon Filling:
- 4 large eggs – Fresh eggs help create a fluffy texture in the filling.
- 1 1/2 cups granulated sugar – Balances the tartness of lemons; can reduce slightly if you prefer less sweetness.
- 1 cup fresh lemon juice (about 4-6 lemons) – The star of the show for that bright, zesty flavor; bottled juice can be used but fresh is best.
- 1 tablespoon lemon zest – Adds an aromatic kick; always zest before juicing for ease.
- 1/4 cup all-purpose flour – Helps thicken the filling; don’t skip this for a perfect set.
Enjoy creating your delicious Lemon Bars!
How to Make Lemon Bars
1. Preheat your oven to 350°F (175°C). This ensures a perfectly baked crust that’s golden and ready to hold the zesty lemon filling.
2. Prepare the crust by mixing softened butter, sugar, and flour in a bowl. Blend until the mixture resembles coarse crumbs—this will create a delightful, buttery base for your lemon bars.
3. Press the crust mixture into a greased 9×9-inch baking dish. Use your fingers or the back of a measuring cup to flatten it evenly, making sure it goes up the sides slightly.
4. Bake the crust for about 20 minutes, or until it’s lightly golden. Keep an eye on it; you want that perfect crispness without over-baking!
5. Whisk together eggs and sugar in a separate bowl until frothy. Add freshly squeezed lemon juice and zest for that bright, tangy flavor that makes lemon bars irresistible.
6. Combine the flour with the egg mixture gently until just incorporated. This will ensure a smooth filling without overworking it—no one likes dense lemon bars!
7. Pour the lemon filling over the baked crust, spreading it evenly with a spatula. The filling should look vibrant and inviting; it will bake beautifully!
8. Bake again for 25-30 minutes, or until set but still slightly jiggly in the center. The edges will turn a lovely golden hue, signaling deliciousness ahead.
9. Cool completely in the pan on a wire rack before slicing into squares. Patience is key here to let those flavors meld perfectly.
Optional: Dust with powdered sugar before serving for an elegant touch!
Exact quantities are listed in the recipe card below.
Expert Tips for Perfect Lemon Bars
- Fresh Ingredients: Use fresh lemons for the best flavor. Bottled lemon juice lacks the brightness that makes lemon bars truly shine.
- Chill Before Cutting: Allow your lemon bars to cool completely and refrigerate them before slicing. This helps achieve clean, neat edges and prevents a messy cut.
- Watch the Baking Time: Keep an eye on your bars in the oven. Overbaking can lead to a dry texture, while underbaking may result in a runny filling.
- Strain the Mixture: To avoid pulp and seeds in your filling, strain the lemon mixture before pouring it over the crust. This ensures a silky-smooth texture in your lemon bars.
- Dust with Powdered Sugar: For a professional finish, dust cooled lemon bars with powdered sugar just before serving. This adds a sweet touch and enhances their visual appeal.
How to Store and Freeze Lemon Bars
- Room Temperature: Keep lemon bars in an airtight container at room temperature for up to 3 days. This way, they stay fresh and zesty for after-meal treats.
- Fridge: For longer freshness, store lemon bars in the refrigerator. They can last up to 1 week when wrapped tightly or in a sealed container, preserving their delightful flavor.
- Freezer: Freeze lemon bars by cutting them into squares, then wrapping each piece in plastic wrap and placing them in a freezer-safe container. They’ll keep well for up to 3 months!
- Reheating: To enjoy frozen lemon bars, simply thaw them in the fridge overnight. For a warm treat, lightly microwave for about 10-15 seconds—just enough to bring back that fresh-baked goodness!
Lemon Bars to Delight Your Tastebuds
Feel free to explore these delightful twists that will make your kitchen sing with flavor and joy!
- Gluten-Free: Substitute the all-purpose flour with a blend of almond flour and coconut flour for a nutty, gluten-free treat. The texture will be slightly different, but it brings a lovely richness that complements the tangy lemon.
- Honey-Sweetened: Replace granulated sugar with honey in equal measure for a natural sweetness that adds depth. This variation not only sweetens but also introduces a floral note that beautifully balances the tartness of the lemon.
- Berry Boost: Fold in fresh raspberries or blueberries to the filling for a fruity surprise. The vibrant colors and flavors create an inviting visual appeal, making each bite burst with summer freshness.
- Coconut Cream: Use coconut cream instead of butter for a tropical flair. This substitution not only offers creaminess but also infuses your bars with a subtle coconut aroma that makes every bite feel like a mini-vacation.
- Spicy Kick: Add a pinch of cayenne pepper or finely grated ginger for an unexpected heat. This intriguing twist elevates the classic recipe, leaving your taste buds tingling with delight after each zesty bite.
- Herbal Infusion: Incorporate finely chopped fresh basil or mint into the filling for an aromatic touch. The herbal notes lend an elegant sophistication and refreshing twist that truly elevates this dessert.
- Chia Seed Boost: Swap out some of the eggs with chia seeds mixed with water for a vegan-friendly option. This clever alternative adds fiber while maintaining the delightful texture you love in lemon bars.
Make Ahead Options
Lemon bars are not only a delightful treat but also a fantastic candidate for meal prep! To make your baking experience even smoother, you can prepare the crust up to 24 hours in advance. Simply mix together 1 cup of all-purpose flour, 1/2 cup of powdered sugar, and 1/2 cup of unsalted butter until crumbly; press it into your baking dish and refrigerate. For the lemon filling, whisk together 1 cup of freshly squeezed lemon juice, 1 cup of granulated sugar, and 4 large eggs just before you’re ready to bake—this ensures maximum freshness and flavor. You can store the crust covered in the fridge for up to 3 days or freeze it for longer. When you’re ready to enjoy your lemon bars, simply pour the filling over the chilled crust and bake at 350°F (175°C) for about 20-25 minutes. This way, you’ll have delicious lemon bars ready whenever you need a sweet pick-me-up!
Lemon Bars Recipe FAQs
What kind of lemons should I use for lemon bars?
For the best flavor, opt for fresh, plump lemons that feel heavy for their size. Look for vibrant, bright yellow skin without blemishes. Meyer lemons are a delightful alternative if you want a sweeter, less tart flavor, making your lemon bars extra special!
How should I store my lemon bars after baking?
Once cooled completely, cover your lemon bars with plastic wrap or place them in an airtight container. They can be stored in the refrigerator for up to one week. If you’re like me and prefer them chilled, they make a refreshing treat straight from the fridge!
Can I freeze lemon bars for later?
Absolutely! To freeze your lemon bars, cut them into squares and wrap each piece tightly in plastic wrap, then place them in a freezer-safe container. They will stay fresh for up to three months. When you’re ready to enjoy them, simply thaw in the refrigerator overnight or at room temperature for a few hours.
What should I do if my lemon bars are too runny?
If your lemon filling is still runny after baking, it may need more time in the oven. Return it to the oven and bake for an additional 5-10 minutes until set—look for a slight jiggle in the center when you shake the pan gently. Ensure your oven is properly calibrated; sometimes, ovens can run cooler than expected.
Can I make lemon bars gluten-free?
Yes! To create delicious gluten-free lemon bars, simply substitute all-purpose flour with a 1: 1 gluten-free baking blend. Make sure it’s a blend that contains xanthan gum or add some separately to achieve that perfect texture. You’ll still get that lovely tangy flavor we all adore!
Are there any dairy-free options for lemon bars?
Certainly! For a dairy-free version, replace butter with coconut oil or a vegan butter substitute. Both options work beautifully and maintain the rich taste of traditional lemon bars while keeping it plant-based. Enjoy guilt-free indulgence without sacrificing flavor!


Leave a Comment